
Introduction to Power Pages – Part 2: Creating Pages and Navigation
- Patrick Cooley
- Sep 3, 2024
- 6 min read
In this blog post, we’ll walk through the creation of your pages and navigation buttons that Haylee Adamson created in her demo Intro to Power Pages.
If you missed the first blog that talks about “What is Power Pages?” you can review that here. Otherwise, we’re going to jump right into our step-by-step exercise to create a “Community Events” hub in Microsoft Power Pages!
Exercise Steps
1. Go to the website make.powerpages.microsoft.com.
2. Select Start from blank

3. Enter the name for your site and create a custom web address. Power Pages will check your custom name to make sure that it’s unique, then you can continue by selecting Done.

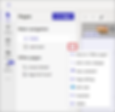
4. You’ll see an animation as Power Pages begins building your new site. Once your site is done, you’ll land on a screen similar to the screen below. Notice that your Pages panel on the left shows a navigation section with the Home page selected. The center of the screen is your canvas for the current page, and there’s a Copilot panel on the right side.

5. Hover over the areas of your page. The header section is editable, and the section below the header has a menu to “choose a component to add to this section”. To the right of List, there’s the option to see More component options.
6. Move your cursor up to the header and select the Edit site header button that appears.
7. The Edit site header popup appears, with the Title + logo tab highlighted. Change your Site title to “Community Events Hub”. You can upload a Site logo by selecting Upload image.

8. In the Add an image popup, you can choose Upload image to pick a custom logo to add or pick a “Stock Image”, then select the image you want to display and select OK. You’ll notice how the logo and title immediately appear in your header.

9. Select the Styling tab in your header popup next. As you hover over the Brand colors filled circles, notice that you can edit these colors to suit organizational preferences. Options for the Layout tab are related to size, but there will be more in the future.

10. Close the Edit site header popup and notice the top right of your home page. This section shows navigation buttons (or a “hamburger” menu determined by the size of your screen – yup, Power Pages adaptable to any size platform!), and as we add more pages, you’ll see those navigation options appear. Let’s add another page to our app by selecting the blue + Page button at the top of the Pages panel on the left of your screen.
11. In the Add a page popup, input “Add Event” as your page name. Leave the Add page to main navigation box checked, and use the Start from blank layout, and this will automatically add our new “Add Event” page to the header navigation. Select Add to create this new page.

12. You should now see your new page titled “Add Event” in your Main navigation section within the Pages panel on the left side of the screen, and you should see it in your app’s header navigation at the top right of your header.

Remember you can modify your main navigation by selecting the ellipsis to the right of any page in your website and selecting from the available options. For example, if you didn’t want a screen to be in your navigation, you could select the option Move to “Other pages” where it wouldn’t be visible. Other options are available to add comments, edit code, duplicate and delete the page.
13. Return to your home page and select the section that’s already on your page. Select the section showing below the site header. Then select Layout and then the 3 Column option.

14. Select the left “Add a component” ellipsis/More button. Then select the Image option.

15. Once you do this, you’ll see the Add an image popup appear on your screen, where you can select an image to add. In the example below, we’ve used stock images (Haylee uses some Copilot assistance to create images that she inserts). Do the same with the other two Add a component section to show images roughly related to gardening, pool, and playground.
16. Hover over the image on the left and select the + (Add a component) button immediately below the image to add a Text component.

17. Erase the “Enter text” and label the first image as “Community Garden”. Change the format from Paragraph to Heading1 and center the label using the controls for the component.

18. Repeat this process for the other two images, labeling them “Community Pool” and “Community Parks”, respectively.
TIP: you can triple click any Text component to select all of the text and then begin typing your new text to erase what was previously there.
19. Add another Text component under each header label by selecting the “plus” icon below your header components under the three photos. Copilot can help with the wording, so try it out by using the following prompts and then select the Copilot button, then select Rewrite, and then you can select Add to page/Replace text to see Copilot replace your label text.
a. Community Garden: Welcome to our community garden
b. Community Pool: Welcome to our community pool
c. Community Parks: Welcome to our community parks

20. Let’s add some buttons to the page. Hover over your screen and find/select the Add a section button below the section with the images. Then select 2 Column. We’re going to add two buttons into our Home screen that will take us to different screens, so a 2 Column section will make it look right.

21. In the new two column section select Button from the one on the left. Input “Add Event” for the Button label and select the option to Link to a page. Select the page “Add Event” from the Select a page dropdown. Then select OK.

22. Select the Align option on your button component (it looks like a shishkabob), and select the Center align option (same picture). This will move your button to the top center of the section.
23. Adjust the Design of your button by selecting the paintbrush icon. This gives you a “no code” way to adjust your CSS properties for the component. Make the following adjustments (you can either type them in or use the sliders to adjust the properties):
a. Shadow – 10 px
b. Border – 6 px
c. Corner radius – 7 px
d. Width – 216 px (found on the Layout tab of the Button design)
e. Height – 58 px (Layout)
f. Font size – 23 px (Typography tab)
Close the Button design popup.
24. Duplicate your “Add Event” button by selecting the (…) ellipsis on the right of the component menu. Then select Duplicate. This will add another button immediately below the first.
25. Drag and drop the new button to the right column of your new section so that you have one button in each column.
26. Select the button in the right column and select Edit to rename it from “Add Event” to “View Events”. Since we don’t have a “View Events” page in our app yet, leave it on “Add Event” as the Link to a page. Select OK.
27. Go to the Pages panel on the upper left of the screen and select the + Page button to add another page. In the Add a page popup add “View Events” as the page name. Then select Add. You will see your View Events page appear in your navigation section and navigation bar in the app header.
28. Return to your Home page and select the View Events button. Select Edit and change the page link to View Events, then select OK. Now you have buttons with links to both pages in your Community Events Hub.
29. If you Preview your website now, you will be able to select either button to navigate to the appropriate page. You can also use the header navigation menu to go to the different pages, and you’ll see the page name appear in the url!
That’s all we’ll cover during this blog post. Now you should have a good idea how to create pages, add image and text components, and create navigation buttons for your app.
In the next blog post we’ll add a form and data to Power Pages. Remember that Dataverse is where your Power Pages data resides. So, you can use your pre-defined Dataverse tables in Power Pages, much like your Lists in SharePoint!
Thanks for joining us at PowerApps911 in learning about Power Pages! If you’d like to see a focused class on Power Pages you can sign up for our Power Pages Jumpstart training.